What makes something "Chewly Awesome"? Any type of food can achieve this status whether it be something sweet, savory, spicy or succulent. When it comes to amazing food, it's not just truly awesome; it's "Chewly Awesome!" This blog is about a mom who wants to feed her family the best and doesn't want to be a slave in the kitchen in order to make that happen. My promise to you is that you will never find a single recipe for Tuna Casserole on this blog! Now that is "Chewly Awesome!"

If you have a dish that is "Chewly Awesome", and you would like for it to be featured on the blog. Email the recipe to talietiger@gmail.com!

Monday, January 23, 2012

"Everything I Love in a Salad" Salad with Grilled Chicken

In order to keep from having backlash from the meal I post last Saturday night, I am posting a SALAD! There was a time in my life that I lived by this mantra - "Never Trust Someone Who Eats Salad As A Meal"....now I am literally eating my words! This salad is a great meal, and it will fill you up!  I always go healthy after eating heavy rich foods, and this salad is a perfect light meal...plus it is easy after you shell the Pistachios :)

Serves 4


3 cups of prepared Chicken diced (You can grill it, saute it, buy it pre-grilled or de-bone a rotisserie chicken)


1 bag of baby leaf spinach rinsed and drained 

1 cup low fat shredded cheddar cheese
1 tomato cut into large dices
2 boiled eggs chopped
1/2 cup pistachios (out of shells) crushed
1 Avocado sliced
Salt

Pepper
Newman's Own Olive Oil & Vinegar Dressing 

I like to add the ingredients in a certain way for this salad purely for aesthetics.
In a large bowl, mix your Spinach, Cheese, and Tomato together.
Sprinkle the chopped boiled egg on top
Sprinkle the Pistachios on top
Lay your Avocado slices on top
Lay your diced chicken on top
Salt and pepper to taste

Serve - allowing each individual to add the desired amount of dressing to their serving.


Fresh fruit goes nicely as a dessert with this meal.  I especially like to have fresh orange slices, blueberries and strawberries after a good salad.

Enjoy!


Saturday, January 21, 2012

Chicken Fettuccine Alfredo

Today was such a busy day for me, and since I had company coming over tonight, I knew I had to cook something quick yet WONDERMOUS!  Chicken Fettuccine Alfredo it is!  This worked out great since I had just made french bread..which is wonderful dipped in the Alfredo sauce.  The first time I made Alfredo sauce, I was amazed at how easy it was to make, and I marveled every time I saw that they still sold it pre-made in a jar at the grocery store.  Seriously...how are people still buy that when it is just as easy to make homemade!
There is something you need to know if you are going to eat Fettuccine Alfredo. Just go ahead to resign yourself to the fact that yes, it is fattening and bad for me, but I can eat salad all day tomorrow; and it will be worth it! Don't try to make this dish "Low Fat" ...it just won't work.  No matter how much you try, skim milk is NOT going to turn into a rich creamy sauce. You must use (all the Paula Deen haters, close your eyes now) heavy cream..!Shhhhh, Listen, you deserve an awesome meal like this at least once or twice a year.  This will be a fattening, CHEWLY AWESOME, only once in a blue moon dish.  :) Hey, at least I did add a spinach salad to make up for it!


Serves 6
Ingredients: 

3 Chicken Breast
1 quart Heavy Cream
1 and 1/2 stick of Butter (3/4 cup)
2 cloves of garlic minced or finely chopped
2 cups finely grated Romano Cheese (This makes the dish so invest in a good Pecorino Romano and, if possible, grate it yourself - Whole Foods has a wonderful Pecorino Romano)
1/4 tsp. Black Pepper (or more if you like)
16 oz  Fettuccine noodles


Bring your water to boil for your Fettuccine noodles - remember they only have to cook in boiling water for 6 - 7 minutes to be al dente. You should start these as the sauce is thickening.
Chicken:
Pound your chicken to even thickness..about 1/2 inch thick.
Drizzle some extra virgin olive oil in a pan and add your chicken
Lightly salt and pepper your chicken
Cook for 7 min. on each side.
Set aside

In a 3 inch deep pan or wide sauce pan, pour in your heavy cream and bring it to a boil
Add your butter and whisk
Allow the cream to reduce and thicken by letting it gently boil for about 5 min
Add garlic
Add your Romano cheese and whisk while adding
Add  Pepper (At this point, you should cook your Fettuccine)
Sauce should be done after another 5 or 10 minutes of gently boiling and reducing

Add your Fettuccine noodles to your Alfredo Sauce

After 1 minute (to allow the noodles to soak up some of the sauce) put the noodles in your serving bowl and pour the rest of the Alfredo Sauce on top.

Add your chicken on top and voila - You have Chicken Fettuccine Alfredo!  Wasn't that easy?

I knew that the Fettuccine Alfredo was going to be the super star of tonight's dinner, and chose to pair it with a simple Tomato and Spinach salad with an Italian Vinaigrette.

Also, since everyone had seconds (Some had thirds), most were too full to even think about dessert until later on in the night.  I just baked a few of the Easy White Chocolate Chip cookies from the dough I had saved in the fridge, and they were a perfect ending to a delectable dinner.


Enjoy!


Friday, January 20, 2012

Homemade French Bread - Yes, You Can!


Seriously, you can make homemade french bread - and if you have a mixer with a dough hook, it's so easy you will slap yourself for ever buying it from the store! The ONLY bad thing about this bread is that it is so good, my family tries to eat it all before I can even serve it with a meal! Don't be afraid of yeast, yes they are alive but they won't bite!  I buy the little jar instead of the packages because it stores nicely in  the fridge, I can control the amount I use, and it is cheaper.  To proof yeast, just put it in 1/2 cup of lukewarm water (water that is comfortably hot...not burn you hot) and sprinkle about 1/4 tsp. of sugar on top then gently stir. Remember, yeast is a living thing...be nice!  After a few minutes,  you will have the fragrant bubbly/foamy creation that will make your bread Chewly Awesome!
This could be the beginning of a beautiful friendship..uh,
I mean French bread

4 cups bread flour (it will work with regular All Purpose flour)
2 1/4 teaspoon active dry yeast (One pkg)
1/2 cup warm water
1/4 tsp. sugar
2 teaspoon salt
1 cup of warm water

Place your yeast in your 1/2 cup of warm water, sprinkle sugar on top, stir and let it wake up - you will know it's ready when it's bubbly and foamy (From the burping, as Alton Brown says)  
 In the mean time, put 1/4 cup of bread flour on your clean counter top and reserve. Place remaining 3 3/4 cups bread flour in your mixer bowl. 
Pour yeast on one side of the bowl, and the salt on the other side (This is important because salt will kill yeast).
MIXER DIRECTIONS: Pour in the other cup of warm water and with your regular mixer paddle, mix on low speed until the dough comes together in a mass. Switch to the dough hook. Mix on medium speed for 2 minutes. Dough should clear the sides but stick to the bottom. If it is too sticky, add 1 tablespoon of flour at a time. If too dry, add 1 tablespoon of water to dough to adjust. Let it rest for 3 minutes then turn your mixer on and mix for another 3 minutes.  Take the dough out and put it on a floured surface and knead it just for a couple of min or until you have a nice smooth dough that is about the consistency of your ear lobe.  Or , you can just poke 2 fingers down in the dough about 1/2 inch. If the holes stay, it's ready.  If they pop back up, keep kneading.  
BOWL/SPOON DIRECTIONS: IF YOU DON'T have a mixer, then here is what you do.  Mix with a wooden spoon until it all comes together in a mass. If it is too sticky, add 1 tablespoon of flour at a time.  If too dry, add 1 tablespoon of water to dough to adjust. Turn the dough over onto your floured surface and begin to knead the dough.  Click here to find out how
Knead the dough for 6 minutes, let it rest for 7 minutes, then knead it for 7 minutes again or until you have a nice smooth dough that is about the consistency of your ear lobe.  Or , you can just poke 2 fingers down in the dough about 1/2 inch. If the holes stay, it's ready.  If they pop back up, keep kneading.
Put the dough in a large oiled bowl (Just take some canola oil and rub it all over the bowl with a paper towel) and lightly cover with either a tea cloth or plastic wrap.   Set the bowl in a warm place and let it rise for about 1 and 1/2 hour.  The ideal temp to let dough rise is 70 degrees or higher.  I turn my oven on, and place the bowl on my stove.  My oven blows out hot air from a vent and gives the bread a nice comfy temperature to rise in.  You can also preheat your oven to 150 degrees, turn it off and place your dough inside.  If you use this method, MAKE SURE YOU HAVE IT IN AN OVEN SAFE BOWL. 
Once the dough has doubled in size, it is ready to be punched down.  Literally, just give it a gentle punch in the center to deflate it then form it back into a ball.  Let it rest 3 minutes.
Now, divide the dough in half (This makes 2 loaf's and you will shape them separately)


The next steps are best told with pictures.
1.)Spread the dough out
to a 6 by 12 rectangle
2.)Fold each long edge into the center


3.)Now give it a good chop down the center 
and stretch the dough out to make it longer..about 16 inches
4.) Pinch the edges together to make a seam

5.)Fold the ends over the seam you
just made and pinch to seal
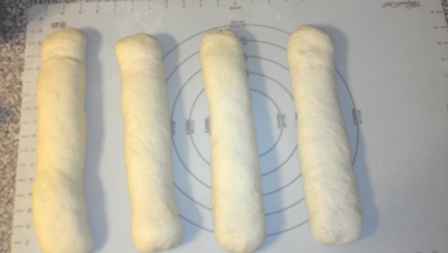
6.)Turn it seam side down (I had a double recipe
that is why there are so many loaves)
7.) Cover with damp paper towels


Repeat with your other half of dough


Let rest for 45 min. or until loaves double in size.
Preheat your oven to 450 degrees and get 1/2 cup of water ready by the stove. If you are using a stone, preheat the stone inside the oven.
Now, take a sharp knife and cut  five, 1/4 inch deep slits across the top of each loaf. (This is going to allow the steam to escape so your bread rises evenly in the oven. ) 
Take your stone out of the oven, if you are using one, and place your loves on the stone
Open your stove, stick your bread in the oven and throw the water on the oven floor. (YES, you read that right...this is safe for your oven, and it creates that steam that  is important for you to get that crusty crust that IS french bread) Immediately close the oven door.  
Bake 20 to 25 min. or until the crust is a nice golden brown.  
Place it on a cooling rack and listen to the symphony with will play for you.  As it cools, it will crackle....it's really amazing! Wait for about 5 to 10 min. to let it cool slightly - this is important if you do not want 2nd degree burns on the roof of your mouth and your tongue!) 
Now, go ahead, cut a slice.  Listen to the crunch of the wonderful crust, and then feel the knife get to the soft pillowy center...then slather it with butter and breathe in the aroma of this wonderful creation as you take a big bite...you deserve it!  
Congratulations! You have made homemade bread!!!!  You are truly a Lady! (The first literal meaning of Lady was "One who kneads bread) Guess what..next time, it will be even easier than this time!

Almost Homemade Jambalaya with French Bread

     Homemade Jambalaya is not hard to make, and I make it often. But when I don't have much time, and I am craving some good Jambalaya, I CHEAT. Yes, I cheat. I go to the store and buy a couple of boxes of LOW SODIUM Zatarains!  It is delish! I do add a few things to the dish to really kick up the flavor.   
I made this for all the teachers at the school I used to teach at; they all thought it was amazing, and were touched that I had worked so hard (for I MUST have worked hard on such an amazing dish!) to cook for them.  Little did they know...until I confessed! This is the recipe that I will share with you today, and I will add my TRULY homemade Jambalaya another day (after I cook it and figure out how much of what I put in there).

There is one mistake that people often make with this and other rice dishes that can tarnish the final product; they take the lid off of the pot while it is all cooking. This lets your steam (which is what makes your rice cook) escape, and you end up with hard bits of rice in your final dish.  My husband has learned to NEVER take the lid off of a pot while something is cooking in it! This is a cardinal rule in my home; and since he doesn't enjoy hard bits of rice in his food, he is all to eager to comply. I favor Kielbasa (or as my mawmaw use to call it, "Monkey Tail Sausage") over the more traditional andouille sausage.  You can use whichever one you like the best.  It can be found right next to the smoked sausage in the store. OH,  I love to use my Le Creuset enamel coated, cast- iron, round dutch oven for this recipe.  Okay, less rambling; more cooking!
Poblano Peppers
Jambalaya
serves 8
Ingredients: 
2 packages of Smoked Sausage sliced (I love Nathans Kielbasa from Publix..Kosher is better :)
3 Chicken breast (pounded even)
5 cups of water or do half water and half chicken broth.
1 large onion diced
1 large poblano pepper seeded (just take the seeds out) and diced
1 teaspoon Garlic Powder
2 Boxes of Zatarains Low Sodium Jambalaya mix.  
French Bread (Heated in the oven to get it crisp)


DIRECTIONS:

Heat your dutch oven to medium heat on your stove top.  
Add your sausage and let it brown.
Remove your sausage and cook your chicken breast in the drippings that are left behind. 
Cook your chicken 7 min. on each side..remember NO CTDs  (Compulsive Turning Disorders) here!
Set your chicken aside to cool.
Put your onion and Poblano in the dutch oven now to saute.  Drizzle in some olive oil before hand If there isn't enough grease left from the sausage and chicken.
While your onion and pepper is sauteing (about 5 min), dice your chicken.
Add your chicken and sausage to the onions and peppers in the dutch oven and stir.
Add your garlic powder and stir
Add 5 cups of water or water/broth mix and bring to a boil
Add your Zatarains Jambalaya Mix and stir. (QUICK! Throw the boxes away so no one knows that you used a mix!) 
Bring it back to a boil. Cover and set on low heat.
Set your timer for 27 minutes and DO NOT TOUCH THAT POT BEFORE HAND! :) Seriously...WALK AWAY! 
When the timer goes off, all of the water should be gone and you should be left with delicious Jambalaya!   If the all water isn't evaporated, just give it a good stir and it will soon be gone.  


Desert?  See my recipe for Easy White Chocolate Chip Cookies.


Wednesday, January 18, 2012

EASY White Chocolate Chip Cookies

Also knows as "Dessert for the rest of the week."   Ok, I really promise..these ARE easy!  You don't even have wait for the butter to get to room temp!  I know!  That always makes me happy - mainly due to the fact that I am a very compulsive baker. If I always had to wait for the butter to get to room temperature before I could bake, I would be out of the baking mood by the time it got there!  These make great ice cream sandwiches, and since you don't have to bake them all in one night, this could be a dessert for another night.  Personally, I just like my cookies with a talk glass of 2% organic milk...yummy!  The dough will keep in the fridge (in an air tight container) for up to 3 days.

White Chocolate Chip Cookies on a
Serving plate my mom made.
WHITE CHOCOLATE CHIP COOKIES
Makes about 36 cookies.  
1 1/4 cups butter (2 and 1/2 sticks
2 cups sugar
2 eggs
2 tsp vanilla
2 c. flour
3/4 c. cocoa
1 tsp baking soda
1/2 tsp salt
12 oz. white milk chocolate chips


Preheat oven to 350 degrees F.
In large microwave safe bowl, microwave your butter on high for 45 seconds
 - just enough to get it soft (This will give the cookie a chewier texture w
hich I love).  


Add sugar and mix until  fluffy and most of the gritty texture from the 

sugar is gone.

Add eggs and vanilla. Mix well.
In separate bowl combine flour, cocoa, baking soda and salt.
Gradually blend into creamed mixture.
Stir in white chocolate chips.
Drop by teaspoon onto ungreased cookie sheet.
Bake 8 minutes. DONE!
Seriously, I just made these cookies in 20 minutes...AND THAT INCLUDES COOKING TIME! 

Chicken Empanadas, Spanish Rice and Sopapilla's

This is a yummy, comfort food recipe that is as easy as pie...maybe because it is a pie.  Unlike fried Empanadas, these are baked and are just as good as the oily, messy fried ones (we will save the frying for dessert!) Now, you can buy pre-made pie crust from the store, but, seriously, it is so easy to make your own!  It's even easier if you have a food processor, and there are over a hundred recipes on the internet.  If you care about how pretty your final product is, you can brush them with an egg white wash (1 egg white with a tablespoon of water) before putting them in the oven.  This will make them brown nicely.


Chicken Empanadas
( 18 Empanadas or 6 servings )

3 cups cooked chopped chicken (about 3 chicken breast) (I saute mine in olive oil on medium high heat for 7 min on each side)
1 cup of shredded cheddar cheese
4 oz cream cheese
1 small yellow onion finely diced
1 chopped seeded Pablano pepper
1 Jalapeno seeded and chopped
1 tablespoon Garlic Powder
1 teaspoon ground cumin
1 teaspoon Mexican Chili powder
1 teaspoon salt
1/2 teaspoon pepper
15 oz of pie crust


Preheat oven to 400 degrees F.
Lightly grease a baking sheet. In a large bowl, combine all the ingredients (adding the cream cheese last ) except the pie crust. 
 Unroll 1 piecrust onto a lightly floured surface. Roll into a 15-inch circle (about 1/8 inch thickness) Cut out rounds, using a 3-inch cookie cutter. Re-roll dough as needed. Repeat procedure with remaining piecrusts, making 18 to 20 circles total. Arrange 1 round on a clean, flat surface. Lightly brush the edges of crust with water. Place 1 heaping teaspoon of chicken mixture in the center of the round. Fold the dough over the filling, pressing the edges with a fork to seal. Repeat with the remaining rounds and chicken mixture. (Up to this point, the recipe can be made ahead and frozen for up to 1 month). Arrange them on a baking sheet, brush with egg wash if desired, and bake 15 to 20 minutes until the edges are golden. 


**Update**
I had quite of bit of the chicken filling left over after I made these.  Today, I rolled out some crescent dough, spread the filling on top, rolled them back up, and made these little roll ups.  These are delicious!


Spanish Rice
While you could add diced onion and a chopped Poblano pepper to this (after you sauteed them) to add extra flavor, this version is much easier, less time consuming, and makes a delicious side dish that let's the main dish do most of the talking. 


serves 6

6 cups cooked rice
1/4 cup Chicken Broth  
1 Tomato diced
1tsp. Salt (or more to taste)
2 tsp. Garlic powder
1  tsp Ground Cumin
1 tsp. Chili Powder


1/2 tsp. Celery Salt

Mix all ingredients together in a skillet and cook on medium heat, stirring frequently, until liquid is reduced.  Enjoy!


Sopapeazies (easy Sopapillas)
Flour Tortillas (Or you can use left over pie crust if you have enough)
Oil
Cinnamon
Powdered Sugar
Honey

Heat 1/4 cup of oil in a 10 inch skillet on medium heat. 
Gently lay tortillas in hot oil and let fry for 3 minuets on each side.
Set on a paper plate with paper towels to drain oil
Sprinkle with Cinnamon and powdered sugar, and drizzle honey on top.  

Dilly Chicken Sandwiches

A sweet friend introduced me to this wonderful sandwich, and now I am addicted!  This recipe can be found on different sites around the web, but I am going to post my version here for your eating pleasure.   I hesitate to call this just a sandwich.  It should have a much more grandiose name, but I can't think of one at 1:30 in the morning.  When I first tasted this sandwich, it was the full fat version; but when I made it on my own, I found out that a lower fat version can be made without sacrificing flavor. Notice I said, "Lower fat" not "low fat."  This is because you can't substitute ALL of the butter, but you can supplement extra virgin olive oil for some of it! Hey, anything helps!  Here is the recipe for just the sandwich. Feel free to garnish with whatever toppings your family enjoys.  I slice up a fresh tomato and add a few fresh spinach leaves or a high quality lettuce.


Dilly Chicken Sandwiches
Serves 4

Ingredients:

8 slices of French Bread 1/2 inch thickness(Or whatever other good bread you can find - I have used ciabatta and italian with great results..even BBQ bread will work!)

4 Chicken breast (pounded to about 1/2 inch thickness or butterflied)

1/2 stick of butter divided in half
1/4 cup of evoo (extra virgin olive oil)
4 fresh garlic cloves minced (PLEASE use the real thing to get the flavor you need)
Salt
1 tablespoon of Dried Dill Weed

SPREAD: Prepare this first by mixing all the ingredients then putting it in the refrigerator until the sandwiches are ready.
1 8oz package of low fat cream cheese
 Juice from 1 lemon (Roll the lemon back and forth on your counter while applying a bit of pressure from your hand to crush the pulp and get the juice before slicing and squeezing)
2 teaspoons of Dried Dill Weed


Preheat your oven to 350.
Melt 1/4 stick of butter and then brush it onto both sides of the bread.  Put your bread in the oven on a baking sheet and toast for 10 min.

In a pan, add 1/4 stick of your butter and evoo stir and wait until it is hot.
Gently lay your chicken in the pan
Sprinkle your chicken with salt and dill - crush the dill in your hands a bit while adding.
Let the chicken cook for 7 min on one side
Turn and add your garlic (if you add it too soon, it will burn) and cook for another 7 min. or until juices run clear.

When your chicken is done, cut it up so it will fit nicely on your bread slices.  Spread the Cream Cheese spread on the top slice of bread, put some chicken on the bottom slice and garnish with desired items.

I serve this with a dill pickle slice and plain potato chips.

ENJOY!